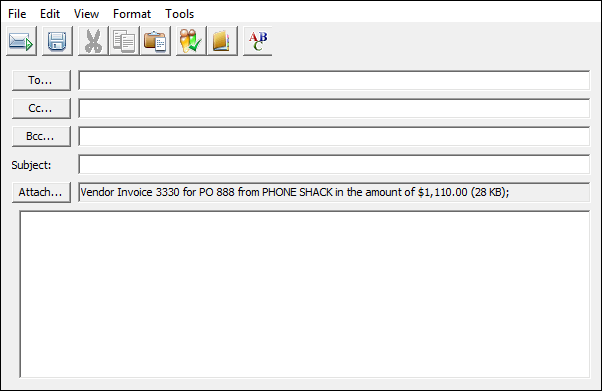
Using the Mail Message Dialog Box
The OnBase Mail Message dialog box is only displayed when using Novell GroupWise.
SMTP is not supported in the Unity Client or Web Client.

To display the Bcc field, select View | BCC.
The Format menu displays message formats available for your Native Mail System. To make the selected format the default format for future messages, select Set as default.
The buttons in the Mail Message toolbar are described in the following table.
To change the way the toolbar is displayed, click View and select Large Toolbar to display large toolbar buttons or Small Toolbar to display small toolbar buttons.
|
Button |
Description |
|---|---|

|
Send- Click to send the mail message. This feature is also available by selecting File | Send. |

|
Save- Click to save the mail message. This feature is also available by selecting File | Save. |

|
Cut- Click to cut highlighted text in the message field. This feature is also available by selecting Edit | Cut. |

|
Copy- Click to copy highlighted text in the message field to the clipboard. This feature is also available by selecting Edit | Copy. |

|
Paste- Click to paste text in the message field that was copied to the clipboard. This feature is also available by selecting Edit | Paste. |

|
Check Names- Click to verify names and email addresses entered in the To field from your Address Book. This feature is also available by selecting Tools | Check Names. |

|
Address Book- Click to open the Address Book and add email addresses to the Message Recipients text boxes by selecting the Name, then clicking the To, Cc, or Bcc buttons. To remove names, double-click on the name in the Message Recipients list and it will return to its original location. This feature is also available by selecting Tools | Address Book. Note:
If you are using a large Novell GroupWise address book (more than 15,000 entries), all recipient names may not be available in the Select Names dialog box. |

|
Spell Check- Click to spell check text entered in the message field. This feature is also available by selecting Tools | Spell Check. Note:
Spell check is only supported for workstations with Microsoft Word installed. |
